
Laminate flooring brings the look of hardwood without the hefty price tag, but like all flooring materials, it isn’t invincible. Life happens—whether it’s dropped objects, furniture scuffs, or water spills—and suddenly, that once-pristine floor has chips, cracks, or bubbling boards. But don’t worry: you don’t always have to replace the entire floor. With the right tools, techniques, and patience, you can breathe new life into your laminate floor.
This guide will walk you through the most effective ways to repair damaged laminate flooring, whether it’s minor surface scratches or something more extensive. And yes, we’ll also touch on how much these repairs typically cost and when it’s better to call in the pros. So, roll up your sleeves. Let’s get your floor back in shape!
Understanding the Common Types of Laminate Floor Damage
Before diving into the repair process, you must know what type of damage you’re dealing with. This helps determine the most efficient solution.
1. Surface Scratches and Chips:
These usually come from moving furniture or heavy foot traffic. The good news? These can often be fixed using a laminate floor repair kit. These kits include wax pencils, putty, and color blends that make scratches almost invisible.
2. Water Damage or Warping:
Moisture is the enemy of laminate. If you’ve had a spill or leak, and the floor is swelling or separating at the seams, you might need to replace individual planks rather than try to repair them.
3. Cracks or Broken Edges:
This type of damage often requires panel replacement. Fortunately, if you have leftover boards from your initial laminate floor installation, you’re already halfway to a fix.
The Must-Have Laminate Floor Repair Tools
You can’t complete a job right without the right tools. For DIY laminate flooring repair, gather these essentials:
- Laminate floor repair kit (includes color-matched filler, spatula, and sometimes wax).
- Putty knife or plastic scraper.
- Utility knife.
- Chisel and hammer (for plank removal).
- Replacement laminate planks.
- Wood glue.
- Clap or use a heavy object to apply pressure.
These tools are readily available in most home improvement stores and don’t cost much, especially compared to a full replacement.
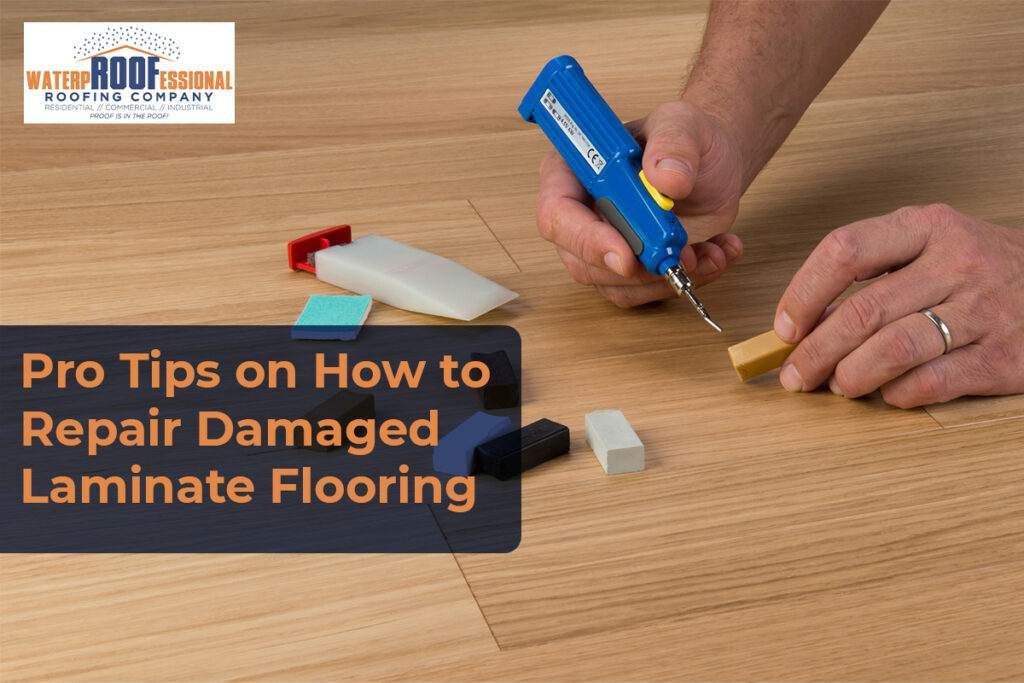
Quick Fix: Using a Laminate Floor Repair Kit
If you’re dealing with small nicks, chips, or scratches, a laminate floor repair kit will be your best friend. Here’s how to use it effectively:
Step 1: Clean the damaged area thoroughly with a damp cloth and let it dry.
Step 2: Use a matching filler color to blend the repair with the original floor. Kits often come with several shades, so mix and test before applying.
Step 3: Fill the chip or scratch with wax or putty and level it with the scraper.
Step 4: Let it dry and gently buff the area.
The result? A near-invisible patch that makes your laminate flooring look like new.
Replacing Damaged Laminate Planks Like a Pro
If the damage is beyond a simple fix, it’s time to replace the plank.
Step-by-step guide:
- Mark the damaged board. Use painter’s tape to outline the area.
- Cut out the plank. Drill holes in the corners and cut through the center with a circular saw.
- Remove the pieces carefully. Use a chisel to lift out the broken sections.
- Prep the new plank. Trim the tongue edges so it can fit snugly into place.
- Apply glue and press. Secure the new board and add weight until it sets (usually 24 hours).
Need help finding replacement panels or guidance? Consider contacting trusted local contractors like Waterproofessional for expert advice.
Repairing Laminate Floor Water Damage
Water damage requires a little more effort and speed.
Here’s what to do:
- First, dry out the area immediately using fans or a dehumidifier.
- Next, remove any swollen or buckled planks. These can’t be saved.
- Replace them with new boards, following the same steps mentioned above.
To prevent future damage, seal all joints well and avoid excessive moisture.
Pro tip: Place mats in high-spill zones like kitchens and bathrooms.
Dealing with Laminate Floor Chips and Edge Breaks
Laminate floor chip repair is straightforward if you act quickly. For minor chips:
- Use colored wax filler sticks from a laminate floor repair kit.
- Blend the colors to match and fill in the chipped area.
- Buff lightly once the wax hardens.
For edge breaks or corners that crack, you may have to replace the full panel or cover the edge with a custom trim for aesthetics.
To stay within budget, weigh your options. Minor cosmetic damage? Do it yourself. Structural or water damage? Call in the pros.
Want to pair this with other home updates? Check out services like interior demolition in Champaign or clean-out services for a full refresh.
Final Thoughts: Keep Your Laminate Floor Looking Sharp
Laminate flooring is durable, stylish, and budget-friendly, but even the best floors need a little TLC. Whether you’re patching a small scratch or replacing damaged planks, knowing how to repair laminate flooring properly will save you time, money, and stress. Remember: act quickly, use the right materials, and don’t hesitate to bring in pros when needed.
Need a hand with your home project? Visit Waterproofessional.com to explore more services that can enhance your flooring and beyond.
FAQs About Laminate Floor Repair
Q1: Can I repair laminate floors without replacing them?
Yes! For minor issues like scratches, chips, or dents, you can use a laminate floor repair kit.
Q2: Is laminate floor water damage fixable?
If caught early, yes. You can remove and replace affected planks. Severe damage may require wider replacement.
Q3: Are there professionals who do this kind of repair?
Absolutely. Vinyl and laminate floor repair contractors can assess and handle more complex damage.
Q4: How long does a laminate floor repair take?
Simple fixes take an hour or two. Full plank replacements may take a day, especially if glue needs time to set.
Q5: Do I need special training to repair laminate floors?
Not at all. Most DIYers can handle basic laminate flooring repair with just a little patience and the right tools.

